


Key Takeaways
- Shade net carports typically last 5-8 years before needing repairs or replacement
- Common issues include torn fabric, sagging nets, and damaged frames
- DIY repairs are possible for minor damage but professional help is recommended for structural issues
- Regular maintenance extends the lifespan of your shade net carport
- Specialized repair services in Gauteng typically charge between R800-R2500 depending on damage extent
What Are the Most Common Shade Net Carport Problems in Gauteng?
You’ve probably noticed your shade net carport ain’t looking so great lately. Maybe it’s got a few tears, or the whole thing’s starting to sag in the middle. These problems are super common in Gauteng, where our harsh sun and those unexpected summer storms really test these structures.
In my 15 years fixing shade nets across Gauteng, I’ve seen it all. The biggest issues people face are fabric tears, sagging nets, and bent or broken frames. The fabric tears usually happen cause of branches falling during storms or just the material wearing out after years in the sun. The UV rays here are brutal—they break down the material over time.
Frame damage is another headache for carport owners. It happens when the wind gets under a loose section of netting and pulls on the frame, or sometimes when vehicles accidentally bump into support posts. I’ve fixed countless frames that bent during those heavy storms we get in December and January.
Most shade nets in Gauteng last about 5-8 years before needing serious attention. But I’ve seen some that needed repairs after just 2 years because they weren’t installed right in the first place.
How Do You Fix a Shade Net?
Fixing a shade net isn’t rocket science, but you do need the right approach. First thing’s first—you gotta figure out what’s actually wrong with it. Is it just a small tear, or is the whole net shot?
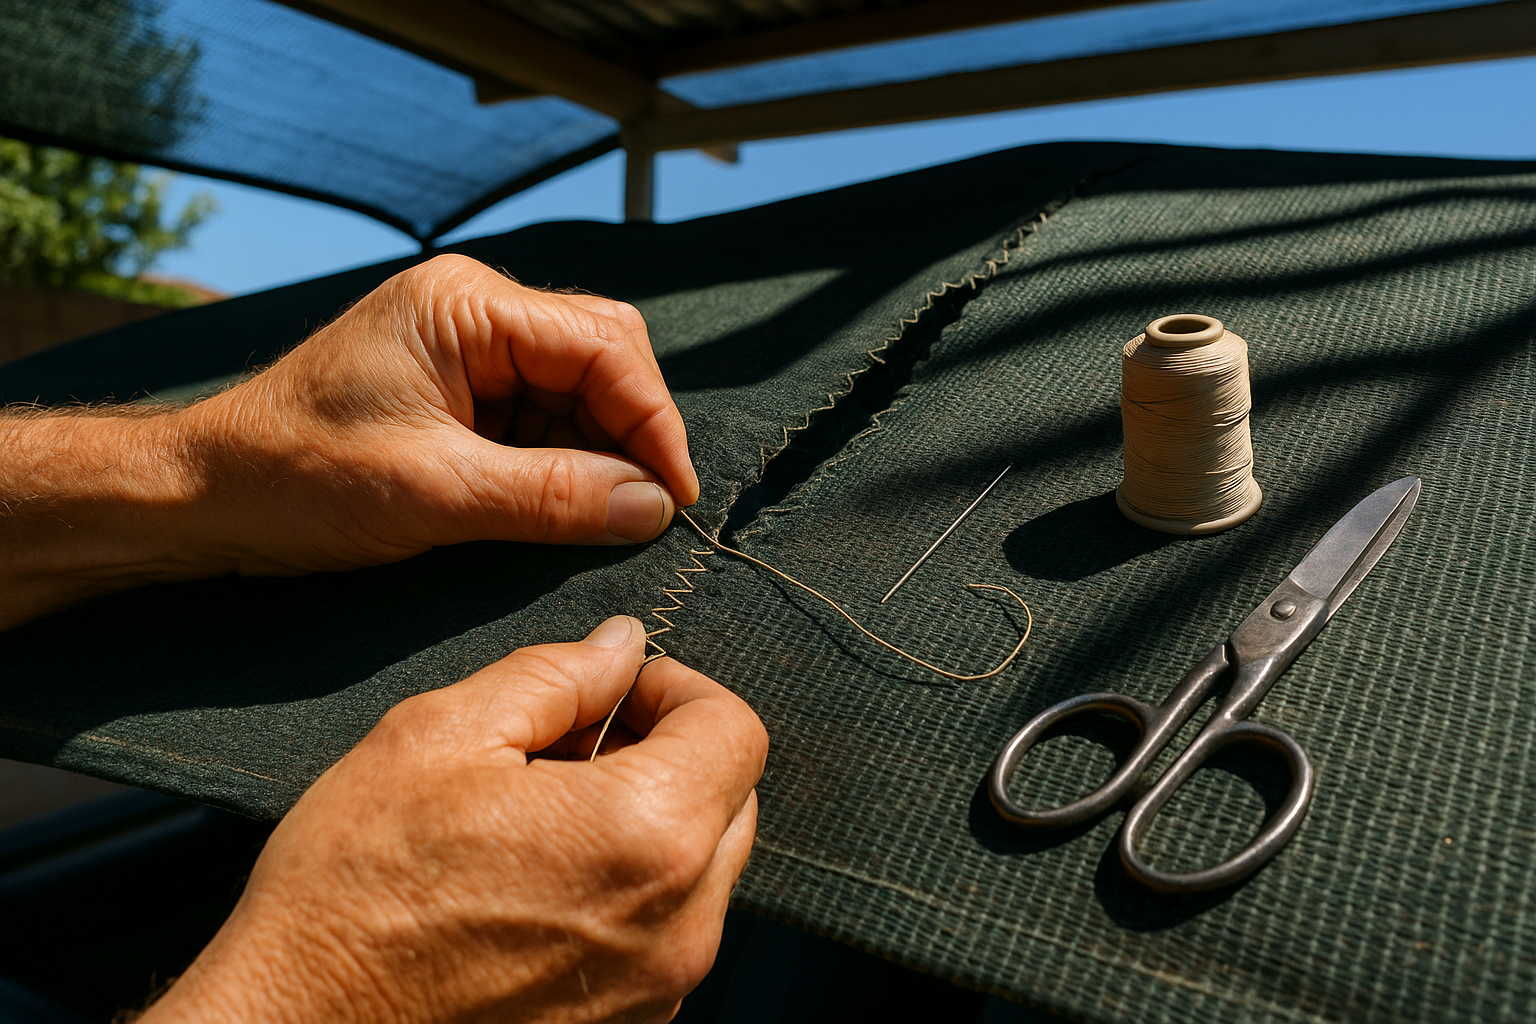
For small tears, the fix is pretty straightforward. You’ll need some shade cloth repair tape or a needle and strong UV-resistant thread. Clean the area around the tear, then either apply the repair tape (pressing firmly to make sure it sticks properly) or sew the edges together with tight, small stitches. I always tell my clients to use a zigzag stitch pattern when sewing—it holds better in windy conditions.
For bigger problems like large tears or severely worn material, replacement is often better than patching. To replace sections, you’ll need to:
- Measure the damaged section carefully
- Cut a replacement piece slightly larger than needed
- Remove the damaged section by unfastening it from the frame
- Secure the new piece using wire ties, hog rings, or sewing
- Pull it tight as you go to avoid future sagging
When I replaced Mrs. Nkosi’s shade net in Pretoria last month, I showed her how important tension is. If you don’t pull the material tight enough during installation, it’ll sag and collect water when it rains. That extra weight can damage both the net and frame.
One trick I’ve learned over the years: don’t try to repair shade nets during the hottest part of the day. The material expands in heat, so if you pull it tight when it’s hot, it’ll get too tight and might tear when it cools and contracts at night.
How to Make a Carport Stronger?
Making your carport stronger isn’t just about fixing problems—it’s about preventing them too. A stronger carport stands up better to Gauteng’s weather extremes and lasts way longer.
The frame is where you should start. Check all connection points for rust or looseness. Replace any rusted bolts and tighten everything up. I reckon about 70% of the carports I inspect have loose bolts that nobody’s checked in years.
Adding diagonal bracing makes a huge difference to stability. These braces distribute force across the structure instead of letting it concentrate at the joints. You can add metal or wooden braces between posts and beams at 45-degree angles. When I upgraded Mr. Molefe’s carport in Sandton, adding just four diagonal braces made his structure solid enough to withstand those crazy October winds.
Concrete footings are another weakness point. If your posts are wobbly, you might need to reinforce the footings. Dig around the base of each post and pour new concrete to create a wider, deeper foundation. This job’s a bit messy but makes your carport much more stable.
For the shade net itself, reinforcing the edges with strong binding or extra stitching prevents tearing at attachment points. Double-layering the corners where tension is highest also helps a ton.
Here’s a quick strength upgrade checklist:
- Tighten all bolts and replace rusted hardware
- Add diagonal bracing to the frame
- Reinforce concrete footings if posts are unstable
- Strengthen edge attachments and corners of the shade cloth
- Consider adding extra support posts for wider carports
Are Shade Sails Good for Carports?
Shade sails are definitely good for carports, especially in Gauteng’s climate. They block up to 95% of harmful UV rays while still letting air flow through, which keeps your car cooler than solid-roof alternatives.
The big advantage of shade sail carports is their flexibility. You can install them in almost any space, even awkward areas where traditional carports wouldn’t fit. I installed a custom triangular sail for the Khumalos in Centurion when they couldn’t fit a regular carport in their narrow side yard.
Cost-wise, shade sails are typically cheaper than building a solid carport. A basic setup runs between R5,000-R12,000 depending on size and quality, compared to R15,000+ for solid structures. They’re also quicker to install—usually just a day’s work rather than several days for conventional carports.
But they’re not perfect for everyone. In areas with heavy hail (like the West Rand), shade sails don’t offer enough protection. They can also collect leaves and debris if installed too flat, and they need proper tensioning to avoid water pooling.
Durability depends hugely on quality. Commercial-grade shade cloth (240-320 GSM) lasts about 10 years, while cheaper materials might need replacement after 3-5 years. I always tell my clients to invest in quality material upfront—it’s cheaper in the long run.
From my experience, the people most satisfied with shade sail carports are those who prioritize:
- UV protection over complete waterproofing
- Aesthetic appearance
- Lower cost
- Ease of installation
- Airflow and temperature control
How Do You Attach Shade Cloth to a Carport?
Attaching shade cloth properly is crucial—it’s actually where most DIY jobs go wrong. The right attachment method keeps your shade cloth tight, prevents sagging, and helps it last longer.
The most common attachment methods are wire tensioning systems, rope lacing, and individual fasteners like snap hooks or turnbuckles. For carports specifically, I usually recommend a wire tensioning system around the perimeter.
To install using the wire tensioning method:
- Run a galvanized steel wire through the edge pocket or along the edge of your shade cloth
- Secure the wire at corners using turnbuckles
- Pull the wire tight using the turnbuckles
- Attach the wire to your carport frame at regular intervals (every 50-75cm)
For direct attachment without wire, grommets work well. You’ll need to:
- Install grommets along the edge of your shade cloth (about every 50cm)
- Thread rope or bungee cord through the grommets
- Secure to your carport frame using hooks or by lacing around the frame
The trick is getting the tension right. Too loose and it’ll sag; too tight and it might tear. I suggest tensioning on a warm day when the material is slightly expanded. That way, it’ll tighten up a bit more when it cools down.
Last summer I helped the Moodleys in Johannesburg attach new shade cloth to their old carport frame. We used a combination of edge wire for the perimeter and individual fasteners for the middle supports. The key was creating even tension across the entire surface.
One mistake many people make is using regular zip ties which degrade quickly in the sun. Always use UV-resistant fasteners—they cost a bit more but last years longer.
DIY vs Professional Shade Net Repairs in Gauteng
Deciding whether to fix your shade net yourself or call a pro depends on several factors. In my years working across Gauteng, I’ve seen plenty of DIY disasters that ended up costing more than if they’d called a professional from the start.
DIY repairs make sense for:
- Small tears (under 30cm)
- Simple re-tensioning
- Replacing individual fasteners
- Minor frame adjustments
Professional repairs are better for:
- Large tears or worn-out material requiring full replacement
- Structural frame issues
- Installation of new attachment systems
- Height or angle modifications
Cost is obviously a big factor. DIY repairs might cost you R200-R500 for materials, while professional repairs in Gauteng typically range from R800 for minor fixes to R2500+ for major repairs or full replacements.
Time is another consideration. A pro team can usually complete repairs in a few hours, while DIY projects often stretch over several weekends, especially if you’re learning as you go.
I remember helping Mrs. van Wyk after she tried to replace her shade net herself. She’d bought good quality material but didn’t tension it properly. After the first rain, water pooled in the middle and the extra weight tore it from the attachments. We had to start over with new fittings, which cost her more than if she’d called us initially.
That said, simple repairs are definitely doable for handy homeowners. If you decide to go the DIY route, take your time and research proper techniques first. Watch some videos, and don’t skimp on materials—especially fasteners and edge reinforcements.
Best Materials for Shade Net Repairs in Gauteng’s Climate
Gauteng’s climate is pretty tough on outdoor materials. We get intense UV radiation, occasional hailstorms, and those summer thunderstorms that test everything to its limits. Choosing the right repair materials makes a huge difference to how long your fix will last.
For the shade cloth itself, look for HDPE (High-Density Polyethylene) material with at least 80% shade factor. The GSM (grams per square meter) should be at least 180 for residential carports, but I recommend going up to 240-280 GSM for better durability. The denser material costs more but lasts years longer in our harsh sun.
When selecting repair tape, avoid the cheap PVC options and choose specialized shade cloth repair tape with UV inhibitors. Regular duct tape might look fine for a week, but it’ll disintegrate after a month in the sun.
For stitching repairs, use PTFE (polytetrafluoroethylene) thread or UV-stabilized polyester. Regular polyester thread breaks down quickly outdoors. I learned this lesson early in my career when I had to redo several repairs that failed because I used regular thread.
For attachment hardware, stainless steel or hot-dipped galvanized options resist our summer rains best. Aluminum fittings are lighter and don’t rust but aren’t as strong. Plastic components should be avoided unless they’re specifically UV-stabilized.
Here’s a comparison of material lifespans in Gauteng conditions:
| Material Type | Expected Lifespan | Best Use Case |
|---|---|---|
| Standard HDPE (140-180 GSM) | 3-5 years | Budget repairs, temporary solutions |
| Commercial HDPE (240-320 GSM) | 8-10 years | Long-term installations |
| PVC shade cloth | 2-4 years | Areas with less direct sunlight |
| Regular repair tape | 3-6 months | Emergency temporary fixes |
| UV-stabilized repair tape | 2-3 years | Semi-permanent repairs |
| Galvanized attachments | 5-8 years | Standard installations |
| Stainless steel attachments | 10+ years | Premium installations |
Finding Reliable Shade Net Repair Services in Gauteng
Finding someone trustworthy to fix your shade net can be tricky. There are lots of handymen claiming to be experts, but proper repairs need specific knowledge and materials.
Start by asking for recommendations from friends or neighbors who’ve had similar work done. Local community Facebook groups are gold mines for service recommendations—I’ve gained many clients through word-of-mouth in these groups.
When evaluating repair services, ask these questions:
- How long have they been working with shade structures specifically?
- Do they provide a warranty on their repairs?
- What type of materials do they use?
- Can they show photos of similar repairs they’ve completed?
- Are they willing to provide references?
Red flags to watch for include contractors who:
- Can’t show examples of previous work
- Offer quotes without seeing the damage
- Demand full payment upfront
- Use vague terms to describe the repair process
- Don’t discuss material options with you
Pricing varies across Gauteng, but most professional repairs fall between R90-R150 per square meter for material replacement, plus labor costs of R350-R500 per hour. Always get at least three quotes before deciding.
I’ve competed against companies that quote super low prices but use inferior materials. They might be half the price upfront, but the repairs often fail within a year. Quality repairs should last at least 5 years with proper maintenance.
Most reputable companies in Gauteng offer free inspections and quotes. Take advantage of this to compare approaches—different contractors might suggest different solutions based on their experience.
Frequently Asked Questions
How long do shade net carports typically last in Gauteng?
With proper installation and maintenance, a quality shade net carport in Gauteng should last 7-10 years. Lower quality materials might only last 3-5 years due to our intense UV exposure and seasonal storms. The frame, if properly galvanized or powder-coated, can last 15+ years.
Can shade nets be repaired during rainy season?
It’s possible but not ideal. The material needs to be completely dry before repairs, especially for tape or adhesive solutions. Also, tensioning is harder to get right on damp material. If possible, plan repairs during our dry winter months for best results.
How much does it cost to completely replace a shade net on an existing carport?
For a standard single-car carport (about 18-20 square meters), complete shade net replacement costs between R1,800-R3,500 depending on material quality and labor rates. This includes removal of the old material and installation of the new shade cloth with proper tensioning.
Are there shade nets that can withstand Gauteng’s occasional hailstorms?
Standard shade nets offer limited protection against light hail but won’t stop larger hailstones. For better hail protection, look for specialized “hail-resistant” shade cloths with higher density (300+ GSM) and reinforced weaving patterns. These typically cost 30-40% more than standard options but offer significantly better protection.
How often should I inspect my shade net carport for potential issues?
I recommend a thorough inspection twice a year—once before summer storm season (around September) and once at the end of summer (around March). These inspections should focus on checking tension, looking for small tears before they grow larger, and examining all attachment points and hardware.
Leave a Reply